Login
The Scan to Pay Portal is a web browser portal and can be accessed via the following Scan to Pay Admin Portal
This can be accessed via Internet Explorer, Google Chrome, Mozilla Firefox and even Opera Mini.
NotePlease check your company’s firewall rules to ensure this link can be accessed)
Registration
In order to be registered on the Scan to Pay Portal, you will need to supply the Scan to Pay Operations team with:
- Name and Surname
- Email address (this will be your user name)
- Mobile Number
Once this is received, an email from [email protected] will be sent to the email address provided.
See the steps below:

Scan to Pay Portal Registration
NBPlease note that this link is only valid for 24 hours only
Once you select the link, the activation process begins. At this stage, please create your password and verify it.
Once complete, you will now have access to the Scan to Pay Portal.
Login Screen
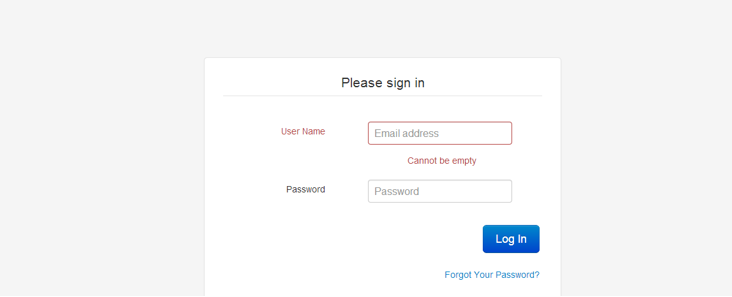
Login Screen
Once you access the url, this screen will appear. In order to access this, you would have been loaded by the Scan to Pay Operations Team. Simply enter your “Email Address” provided to the support team as your User Name and the Password you originally created at the time of registration.
Home Screen
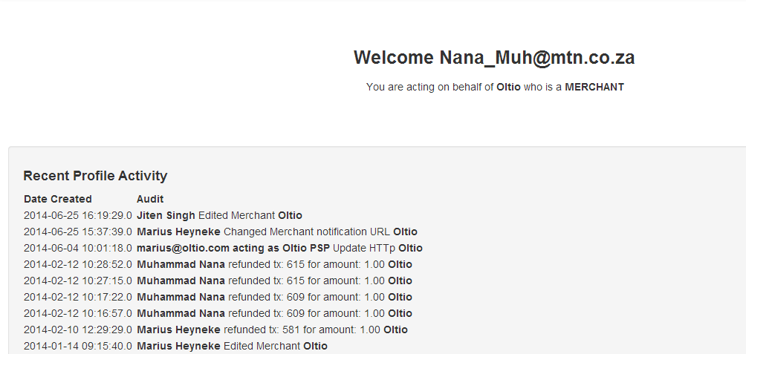
Home Screen
The Home Screen has the following tabs:
Profile Screen
The profile screen merely represents how many Merchants are loaded under your profile. In the case of a PSP, the user can access any merchant he desires by selecting the Merchant in this profile screen (as per below):
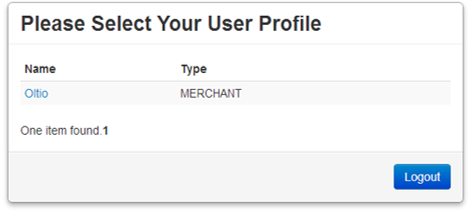
Profile Screen
Home Screen
This screen shows your Audit Activity, essentially your history is displayed on this screen. If you are an Admin User, you will be able to see all Sub Users information on this screen
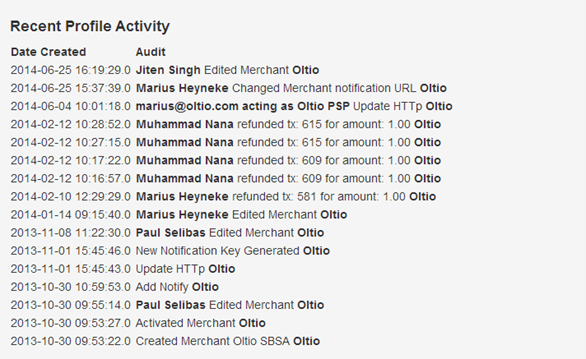
Profile Activity
NoteAll activity on the Portal is recorded
Transactions

Transactions
For query purposes, the Transaction Screen can search for transactions up to and including lengthy period of times. A user can do a search by simply searching on:
Menu Item | Meaning |
|---|---|
Scan to Pay Reference Number | For every transaction, the Scan to Pay API returns a reference number to the merchant / PSP. This is usually a 4 – 6 digit reference number, which may also be found in the merchant's Retrieval Reference number field. |
Merchant Name | For a PSP, a dropdown menu will appear here for a user to do a search confined to a merchant only. |
Mobile Number | A user can search for a transaction or all transactions pertaining to that Mobile Number on that specific merchant under the user's profile. |
Code | Every code represents a 10-digit number, this number can be inserted here to find out the outcome of the transaction. |
Merchant Reference Number | For every transaction, the merchant sends a unique reference number to identify the transaction. This is stored on the Scan to Pay Portal and can be used for ease of reference. |
NoteFor all transactions, a user can specify the time period for a refined search as per below
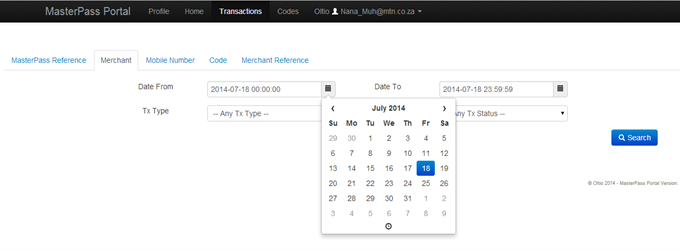
Period of Time
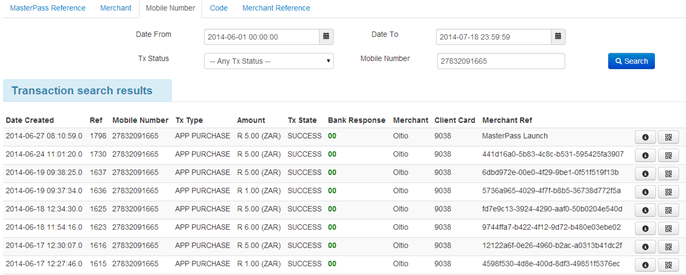
Search Results
The transaction screen then displays the following result of transactions for a specific period. The table above is summarised as follows:
Sub Menu Item | Detail |
|---|---|
Date Created | This shows the date and time of the concluded transaction. |
Ref | This is the Scan to Pay Reference number (either 4 – 6 digits). |
Mobile Number | This is the Mobile / Cell number used in the transaction. |
Tx Type | At this stage there is only one transaction type, which is an App Purchase. In the future, as Scan to Pay evolves there could be other types of transactions such as WIG, NFC etc. |
Amount | This is the amount of the transaction. |
Tx State | This shows the outcome of the transaction in the Scan to Pay Portal. |
Bank Response | This shows the bank ISO response from the Issuer. |
Merchant | This displays the Merchant Name in the transaction. |
Client Card | For PCI purposes, this only shows the last 4 digits of the Clients card number. Scan to Pay is fully PCI compliant, it does not store any customer information. |
Merchant Ref | This displays the Merchant Reference number for that specific transaction (should always be unique). |
If a user would like more information, the user simply can do this by selecting (i) for Information about the transaction
When a user clicks on this, the following information appears:

Transaction Information
Trace
This shows the actual lifecycle of the transaction, from initiation to conclusion.
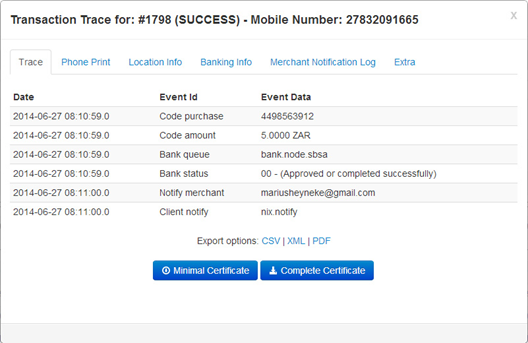
Trace
Phone Print
This shows the actual information of the phone that the App is stored on. Scan to Pay collects a “Phone Print” at
the time of customer registration which provides the customer's IMEI number, IMSI number, App Version Number
and the Serial number of the phone. This is essential for fraud and dispute management.
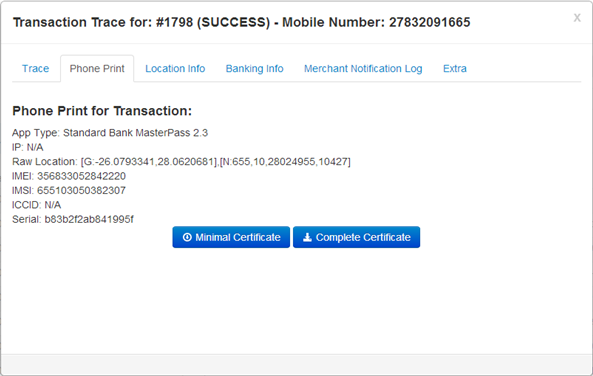
Phone Print
Location Info
The Scan to Pay Portal in a transaction extracts the GPS co-ordinates of the phone. This is recorded, mainly
for fraud and dispute purposes only!
NoteThis is only collected if the customer has enabled the GPS location on his/her cellphone
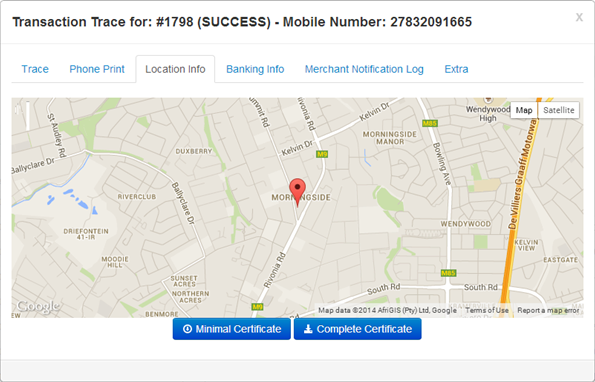
Location Info
Banking Info
The Banking Info screen shows the actual info from the bank, as in which bank the transaction was sent to
(for acquiring purposes) and the Auth Code and date of the transaction.
If the transaction was unsuccessful, no Auth Code will be displayed but the corresponding bank status will
advise the ISO response for this transaction.
The encrypted card number is displayed here, a user will only be able to see the BIN and last 4 digits on the
card information.
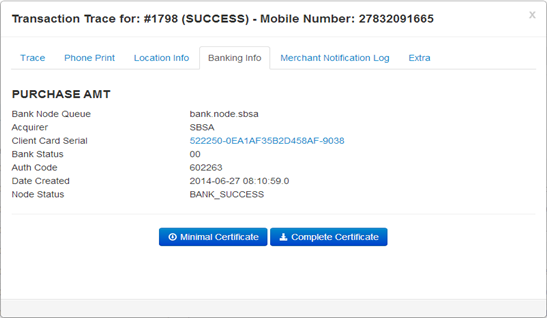
Banking Info
Merchant Notification Log
When a Merchant / PSP integrates into Scan to Pay, an HTTP notification and email address are set up for all transaction outcomes and notifications. This is merely to show/prove that the notification of the transaction was delivered to the Merchant / PSP.
If the notification does not happen, the NOTIFY_EVENT will display as FAILED as opposed to SUCCESS.
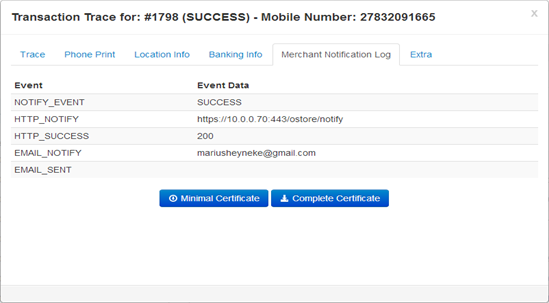
Merchant Notification Log
Extra
For dispute and fraud purposes, a full transaction certificate is made available and can be shared with the disputed party/bank. This essentially stipulates that the transaction was either a 3D Secure (VbyV or Secure Code) transaction or an Authenticated Mobile Transaction (AMT) and liability shift moves to the Issuing bank.
See the Certificate below:
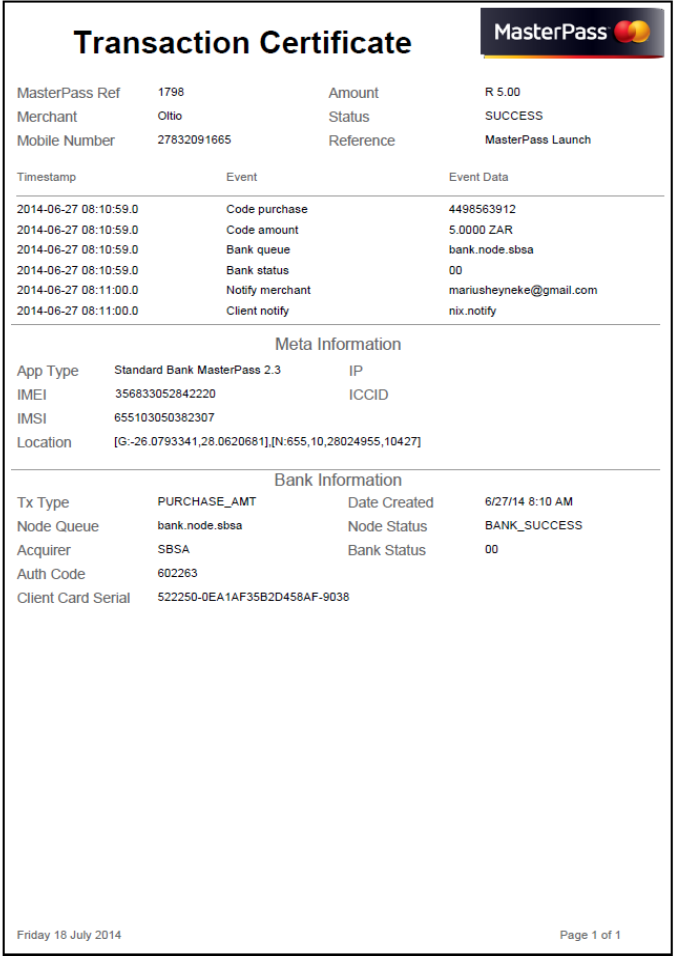
Extra
Scan to Pay Error Messages Interpretation
Coming in 2022
Codes ( Merchants and PSPs Only)
QR Code Search
A QR code represents a 10-digit number, this is generated on the API. This screen represents two things namely:
- A look-up of the code that was generated by the API
- A manual code generation mechanism, indicates that a user can generate codes manually.
Codes can either be static or dynamic.
This means:
- Static – a code is available for a fixed period of time with a fixed amount. A user can create this code and multiple customers can scan and pay with this code until the fixed period is complete.
- Dynamic – a code is made available for a specified period, for a specified amount and only one user can make use of this code at any given time. Once used, the code is automatically finished and is then expired.
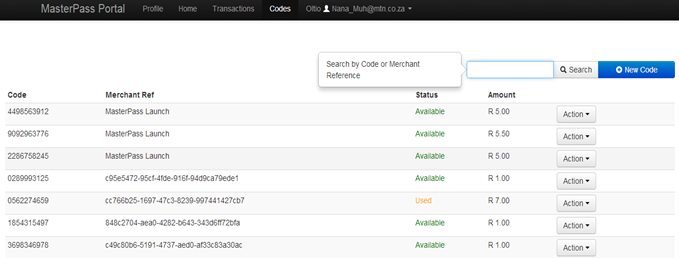
QR Code Search
A user can simply search for the code in the “Search” field above.
The following sub-menus indicate:
Sub-Menu | Detail |
|---|---|
Code | This displays the 10 digit number of the code. |
Merchant Ref | This displays the Merchant reference number, the merchant / PSP indicates this00. |
Status | This shows whether the code is expired, available or has been used. |
Amount | This shows the amount of the code searched for |
If a user would like to edit this code, he may do so by selecting the “Action” icon in line with the code as follows:
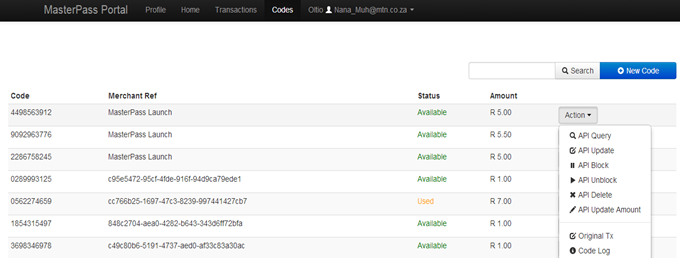
Action Icon
In this instance, the user has the ability to do an:
Drop-down Menu | Detail |
|---|---|
API Query | The user can query the API code, to see the full detail of the code such as when it was generated etc. |
API Update | The user can update the code for a longer period. |
API Block | The user can block the code if fraud is suspected or a “special bargain” is complete. |
API Unblock | The user can also unblock a code if it has been blocked. |
API Delete | The user can delete the code for whatever reason. |
API Update Amount | The user can update the amount of the code here. |
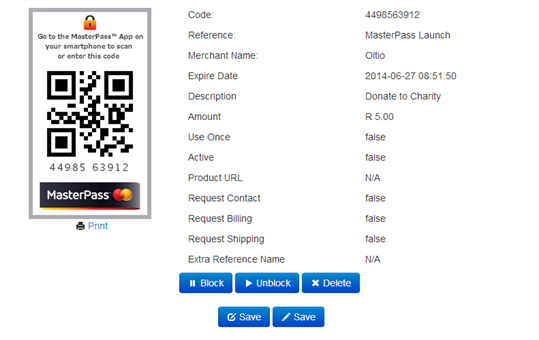
Example
QR Code Generation
A user can manually generate a QR Code by selecting “New Code”

New Code Generation
The user will then be asked to populate the following:
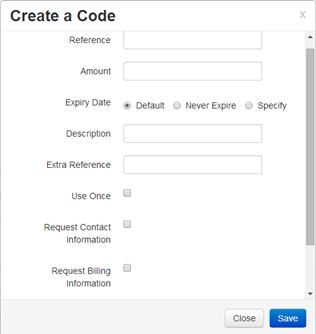
Create a Code
Code Menu | Detail |
|---|---|
Reference | This is the Merchant Reference number field / identifier. |
Amount | This is the amount of the code (fixed). |
Expiry Date | This displays when a code must expire (or not). |
Description | This is the description of good/item (merchant use only). |
Extra Reference | Further description of good/item (merchant use only). |
Use Once | This indicates a dynamic function only. |
Request Contact Info | This is for MOTO / Online transactions, if the merchant requests Contact Info then Scan to Pay must ensure this collected at the time of authentication. |
Request Billing Info | This is for MOTO / Online transactions, if the merchant requests Billing / Shipping Info then Scan to Pay must ensure this collected at the time of authentication. |
Updated 3 months ago
